Cyanotype Workshop
At the weekend I ran a Cyanotype workshop at the Yorkshire Sculpture park. (Cyanotype photography doesn't use a camera. You lay an object on paper coated with a special solution before exposing it to UV light and washing with water to create stunning white and blue pictures.)


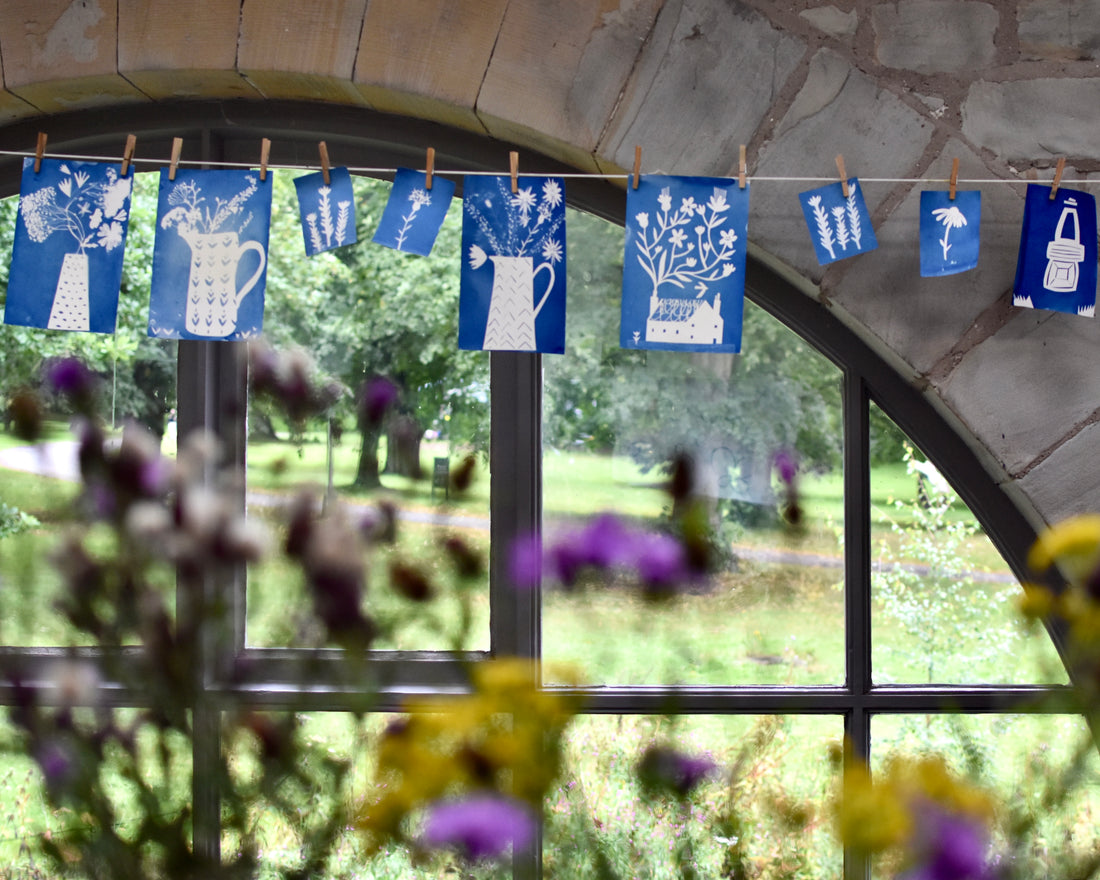
I have seen many people use this process to make images of found objects such as leaves and flowers but I haven't seen many people use paper cut outs. I thought it was a perfect medium for my own graphic art so we combined found objects and paper cutting in the class. I was amazed at how different everyone's designs were and how successful they were, especially because it rained non stop all day!


If you fancy trying this at home over the summer (it's best on a sunny day!) here are my top tips:
What you need
Prepared cyantoype paper
Black paper to make your cut outs (white paper lets light through)
Picture frame to sandwich your prepared cyantoype paper and your cut outs
A tray of water
(Optional extras - acetate and acrylic pens if you want to add drawn line)
I shop at Fred Aldous for all of my materials.
How to do it
Get some inspiration for your design. I like to start with a vase of flowers. You can make a paper cut vase/jug/cup and use real found flowers to fill it! Have a look at blue and white patterned vases online. You can cut patterns into your white vase and these will become blue when you expose them. If you want to add drawn line, use acetate with acrylic pens but beware the shape of the acetate will expose slightly. (Can you see the orange acrylic line on the picture below? That was done by tracing over a real plant).
Get your picture frame and carefully remove the glass and backing board. Put the backing board into the frame and lay a piece of paper the same size as your cyanotype paper in it. This allows you to make a composition to the correct size of the finished piece.


Once you're happy with your composition, take your cyanotype paper from it's sealed dark wallet and lay it on your picture frame. Do this in a dark area if you can because the paper will begin to expose as soon as it hits UV light. Carefully transfer your cut outs and other pieces onto the cyanotype paper. Put the glass from your picture frame on top.

Leave it in the sunlight. It is ready when the paper has lost all colour and looks grey, This may take a minute or up to 45 mins depending on the weather (you can do it indoors up against a window but it will take a long time). Don't put it out in the rain as it will leave spots on the image!


Once it is ready, carefully take your paper from the frame (save your cut outs for the next one) and wash it in a tray of water. Ordinary cold water. You should see the water go yellow. Keep refreshing the tray until the water is clear. Then all the chemical has been washed away. Leave to dry and wa-la!
There is loads of help online if you are unsure.


